Karen and I finished our roof the other day. We’re really happy with it, but it was a lot of work. Nothing was too hard from a technical standpoint; I think it may have been all the trips up and down the ladder and the lifting, pulling, and carrying.
I think we took enough pictures to create a decent guide for others attempting a similar feat. We will see…
We originally planned on a membrane roof. We couldn’t find any installers willing to put one up for us… for a reasonable price. Seems odd. As it turns out, I think we were lucky.
On the way to the post office one day, I stopped in to introduce myself to a local artist – Roger McKasson. (Karen has emailed him before we moved here to see if he had a recommendation on an architect.) We got to talking and I mentioned the problem finding a roofer. He told me that he put on his own roof. He said he used an outfit from Silver City called Mastercraft Metals. He said they came out to his place and cut the roof to fit. He also said they told him how to install it and even lent him the tools to do the job. He said that he and his wife did the job themselves. It sounded too easy. I was intrigued.
I called Mastercraft and they confirmed Roger’s story. Then they quoted the job at a quarter the price of the membrane roof… assuming any one would install a membrane roof in Portal. Ha! (To be fair, in an apples to apples (installed) comparison, the price would have been half the price of a membrane roof.) Karen and I were pretty much on a path at this point.
The significant difference between the standing-seam steel roof (in my opinion) and a membrane roof is that the steel roof will not burn. The membrane roof people say it will not burn, but hot embers will burn holes through the material. Easily repaired I’m told, but better no holes at all. Another big difference for us is that you can install a standing-seam steel roof yourself – not the case with a membrane roof.
Picking a color… Karen and I did not spend a minute thinking about this. There’s been a lot of press regarding white roofs and global warming lately. Between the heat here, global warming and the solar tax credit for picking a white roof… well, you can guess what we did.
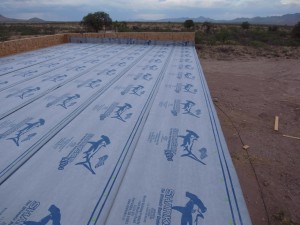
I’ve put up a few roofs before, and I always used tar paper under the roof. The people at Mastercraft Metals told me that these roofs last so long that a new kind of underlayment is needed. They recommended a product called Sharkskin-Ultra. I have to say I love the product. One big concern out here is the wind. I heard one apocryphal story about a guy who put tar paper on his roof four times before the roof was finished; each time a wind came up and ripped off the tar paper. It’s believable.
This Sharkskin stuff is tough. You can’t tear it. The wind never ripped so much as a single hole through a nail. Also, it claims not to change size when the temperature changes. I have to say my observations agree. (Doesn’t this violate some law of nature?) It was very easy to install. Basically, we chalked lines, rolled out a few feet at a time, nailed, repeat, repeat, repeat. The most difficult part for me turned out to be trivial for Karen. The last piece needed to be folded so as to go up the front and side parapet walls. I studied it; I cut pieces to try; nothing but a big angry mess. Karen got up to help me and in a few seconds she had made perfect corners. I still don’t know how she did it, but I quickly nailed them down.
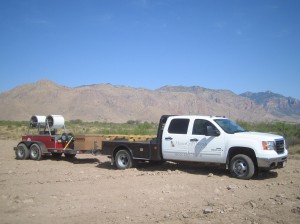
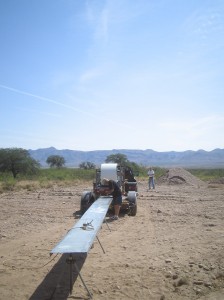
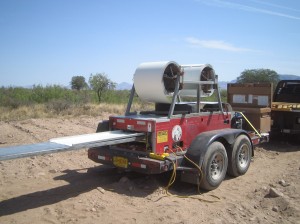
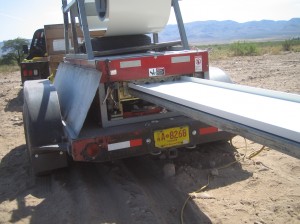
On the appointed day, Floyd from MasterCraft showed up in a big pickup truck pulling a trailer with the equipment to turn a roll of flat steel into the panels for a standing-seam roof. He also brought premanufactured trim pieces and an assortment of goodies to help complete the job.
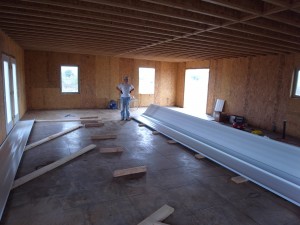
Once Floyd had everything set up, he started making panels. As each one finished, we carried them into our house where we laid them in two piles.
It turned out to be ideal working on these in the house. (Karen wasn’t thrilled with how dirty the floor got, but afterward, it all cleaned up like new.) There is a fair amount of preparation needed, and it’s hot outside. A table would have been nice. We worked on 2×6’s on their side. It worked fine, but there was a lot of crouching.
After all the panels were made and put away, Floyd gave us instructions on how to install the roof. He cut several small pieces of panel to help with the instruction as well as to be a concrete example for later when we would be on our own. Although everything seemed clear and easy when Floyd explained it, a few days later, things were a bit foggy. Between Karen and I, a few calls, and a little trial and error, all went well… quite well. We would encourage anyone to install their own metal roof. We hope this guide helps. Stay tuned for part 2 with more details.

