brad

...now browsing by category


Living with off-grid solar power

Wednesday, September 8th, 2010

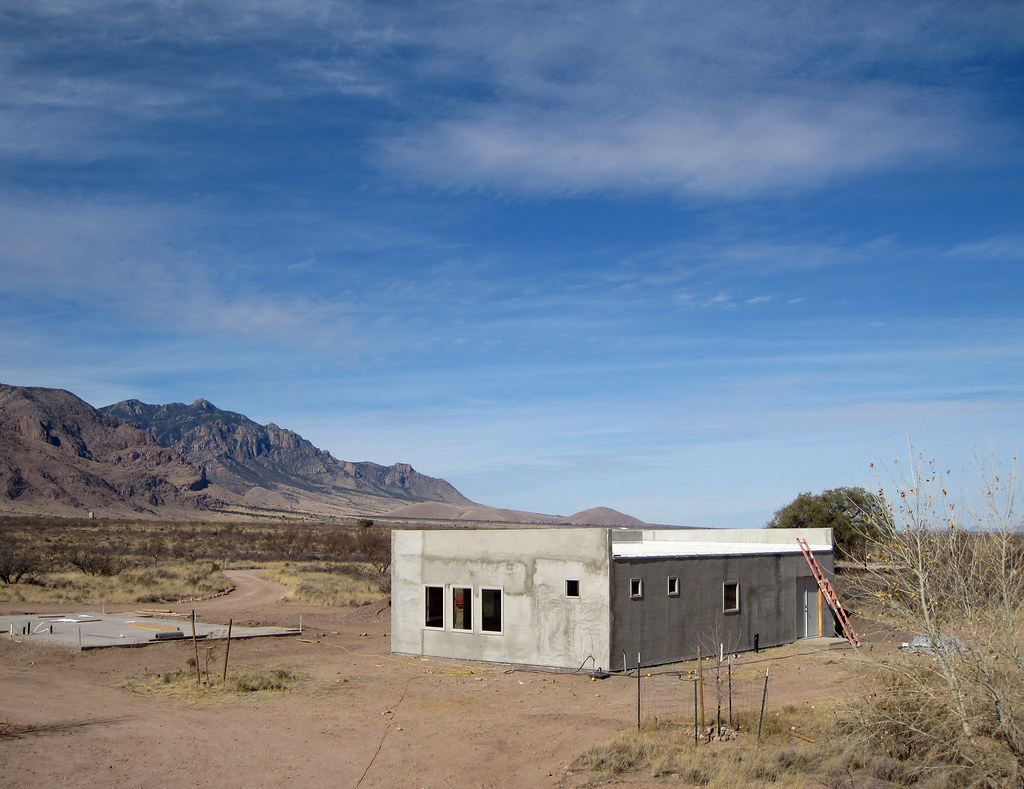
We’ve been living full time on solar power for three months now. We’ve never had an outage or any trouble at all–good news.

You can generalize about life on off-grid solar power to some extent, but each situation is different and depends on its own environment and equipment. Common to everyone, I think, is that you use as much power as you can during hours of sunlight, and you conserve the rest of the time. We seem to have planned pretty well and so far there’s not been the slightest reason to think we’ll empty our batteries. I very much doubt we have the three days of battery power I planned on, but I have thoughts about why this is OK.

On sunny days, which is to say about 95% if the time,  our batteries are usually fully charged by 10:00 AM to 11:00 AM. For the rest of the day, the solar array is in a stand-by (I’m over simplifying) mode supplying power to the house and keeping the batteries charged until there’s so little sunlight that we’re on batteries until the next day. On cloudy days, it can take until 1:00 or 2:00-ish to fully charge the batteries, and we’re often on battery power before the sun has gone down.

We have never had a day in which the batteries didn’t get fully charged. Note that we have not bought a generator yet. This is especially surprising because it’s been a very rainy year, and there’s been a strong monsoon season. Even on quite cloudy days, I’ve seen 1000 watts or more being produced by our solar array. One starts to think that one could get by without a backup generator.

Either we’ve done really well planning our electrical needs, or we’ve had favorable conditions; I can’t be sure yet.

We have a device from the Xantrex people that lets you monitor the solar equipment from a computer. According to it, we’ve never had less than 65% of battery power available. I am suspicious of this number. Every morning it says 65% remaining. I’ve started watching the battery voltage as perhaps a better guide to how much battery power is remaining. Most mornings it reads in the range of 50.8 to 50.2 volts.

One thing I’ve noticed is the the voltage drops in a decidedly non-linear fashion. It drops quickly from 53 volts (that’s the maximum) to 52 and to 51 volts. After that, it slows down. We often go to bed at say 50.4 volts and find it’s only dropped to 50.3 volts in the morning. This makes it really hard to know how much power we really have in the bank. The manufacturer of our batteries says that 48.4 volts is that halfway point that you’re not supposed to drop below. The Xantrex people say that when they say there’s 50% left, that is the point you’re not supposed to drop below. These two don’t jive. Still working on understanding.

It would be pretty easy to figure things out if I want to just turn off the solar array and watch the power slow run out. I don’t think it’s worth the bother of ending up temporarily out of power – especially since we don’t have a generator to bail us out.

They tell you to plan your system for three days without power. I have ambivalent thoughts regarding this. On the one hand, using this as a guide yielded a pretty good system. On the other hand, it’s misleading. There’s never been a day we did not generate a fair amount of solar power. On the other hand, I think you have to get a generator. If you have to get a generator, then running it once in awhile is probably cheaper than buying enough batteries to last three days.

Do you need a generator? I think that you do if you are living full time in your off the grid home. The main reason is the refrigerator/freezer. I think there’s a fair chance that we will never feel desperate to use a generator. Still, as our neighbors can attest, if your inverter fails you’re in the dark without one. One neighbor has been living on his generator for three or so weeks ow while his inverter is being repaired.

A big concern has become the lightning that is so frequent here — especially during monsoon season. One lightning strike about a quarter a mile away from us took out the inverters of two of our neighbors. It also blew out our cable modem – we were lucky. It seems the phone wires carried the power from the lightning strike to our doorsteps. To combat this, I bought a lightning surge protector for the incoming phone lines. When I installed it, it looked to me like the cable that the phone lines come in on is surrounded with copper. I can’t help but think that the lightning runs along this copper to all the houses in the area and “why isn’t it grounded?” OK, it’s grounded where it comes into our house, but I wish it were grounded further away as well.

All in all, living off the grid for us is no different than on the grid except that if you’re on the grid they tell you to run your appliances at night, and we run ours during the day. Well, there is the fact that our power never goes off. Around here, people living on the grid spend a lot of time cursing the frequent, though usually short, power outages.

[A postscript from karen: From my perspective, there is very little that seems different about living off-grid. That is in large part because of all of Brad’s planning and the purchase of a robust system and a lot of new energy efficient appliances. We really don’t avoid using appliances at night — I am writing this after dark; we use the stove and oven every evening (they are gas but the oven uses some electricity); we watch several hours of TV most evenings (it’s still baseball season, though it’s been a dismal one). The biggest difference to me is that Brad is always fussing with watching the system figures. Oh, one more thing — I don’t feel guilty about standing in front of the refrigerator with the door open since we are using no fossil fuels in doing so. I am looking forward to getting a generator (which we will do soon) but only to have one more level of backup. You can’t have too many backup plans in my book.]

Installing a Xantrex XW – part 4

Monday, January 18th, 2010

Well, I started up the inverter today — it was uneventful; everything worked. We have AC power. The solar array charged the battery bank. It was the good kind of uneventful.

I threw the breaker labeled “Inverter Disconnect,” which connected the battery bank to the inverter. The inverter flashed for a second and then lit up showing the battery full. The System Control Panel turned on and showed a warning/fault. I looked at the warning, and it just let me know that new devices were added to the system.

I set the date and time and nothing else really.

Then I turned on the breaker adding the Solar Charge Controller (SCC) into the system. I immediately got another warning – Yes, a new device was added into the system. I did need to configure a couple of of things: battery type and the amp hours of the battery bank. It already knew the voltage of the battery bank.

Then I threw the last breaker to allow power from the solar array to the SCC. Almost immediately I saw voltage from the solar array displayed on the SCC. Soon the batteries were charging. The battery bank was about 50 volts when I began and about 54 volts by the time I left for the day.

And that’s it.

I think Xantrex (now called Schneider Electric or so I hear…) built a great system. Their manuals were great. The wiring diagrams were the best. I read all the manuals and studied the wiring diagrams and as far as I can tell everything worked. I am very happy.

We bought all our solar equipment from Northern Arizona Wind and Sun. I have to say that they were very helpful. They did several quotes for me as I tried to understand what it was I wanted. They did a wonderful job of making sure I bought all the things I needed and nothing I didn’t need. We got a big pile of stuff and it’s all somewhere doing something. While I was doing the installation, I frequently emailed them questions or requests for advice — again, they were very helpful and cheerful about helping. And, their prices were good… very good.

Here are some pictures:

SCC display of the power from the solar array

SCC display of the power from the solar array

The inverter display

The inverter display

The inverter status on the SCP

The inverter status on the SCP

Displaying the SCC info in the SCP

Displaying the SCC info in the SCP

Running a 500 watt light to test a load

Running a 500 watt light to with test a load

-fin-

Installing a Xantrex XW – part 3

Sunday, January 17th, 2010

It’s been a little while since I worked on the Xantrex (solar) system. Two main things caused the delay. One was that a few items needed to be ordered before I could finish the installation. The other was that we got started with the first coat of stucco and wanted to finish that as quickly as possible.

What needed to be ordered? We needed two DC breakers and one AC breaker. The DC breakers are clearly called for in the wiring diagrams. I wondered why they didn’t just come with the inverter. I can only assume that it’s because there are so many possible ways to configure this system and that some don’t use those breakers. The AC breaker is because I want power in the battery house. Other things I needed were flexible conduit, 3/4 inch and 1/2 inch, adapters for the 1 inch knockouts to 3/4 and 1/2 inch.

The first thing I tackled was the wiring of the solar array to the SCC. I used one of the new DC breakers to do this. The negative wire coming from the solar array goes into the PDP and directly to the PV- spot in the SCC (the white wire at #3 below). The positive wire goes to the top of the new DC breaker (the top of #1 – not visible). A new wire is added from the bottom of this breaker to the PV+ in the SCC (See #1 goes to #3). Note that this was done with the breaker in the OFF position.

PDP DC wiring

PDP DC wiring

I then ran the wires from the SCC to the battery. These wires allow the SCC to charge the battery bank. The negative wire from the SCC goes to the DC negative busbar in the PDP (See the white wire above #2 below). The positive wire goes to the top second new DC breaker (also in the off position). (See #1 below.) A new wire goes from the bottom of this breaker to the positive DC busbar (See #2 and #4 above) attached to the large DC breaker where the positive cable from the battery attaches.

The upper half of the PDP

The upper half of the PDP

Solar Charge Controller wiring

Solar Charge Controller wiring

Next the networking cables needed to be attached and then moved. For whatever reason, I placed the network terminator to the right. When I went to install the cover for the SCC, it would not fit because the terminator blocked the place where the screw attaches. I reversed the cable and the terminator, and all was well.

Networking and battery sensor cables

Networking and battery sensor cables

Adjusted so the cover fits

Adjusted so the cover fits

The battery temperature sensor was attached in the SCC as well. Speaking of the battery sensor… I’ve read the manuals quite a bit and was not sure what to do with the two battery sensors I received. Somewhere I read that only one was required; the data is shared on the network. Elsewhere I read that if there is more than one, whichever  one has the higher value is used. That made me think that there’s value in using both of them. So I installed both of them. One attaches to the inverter and the other to the SCC. I attached the sensor ends to two different batteries in the battery bank.

The battery sensor installed

The battery sensor installed

The next thing I did was to hook up the positive cable from the battery bank. The only tricky thing about this is that it made sense to me to connect the cable inside the PDP first and then connect the other end to the battery bank. I was worried about touching the hot end of the cable somewhere inside the PDP it should not touch.

I believe the system is ready to be turned on. I decided to give it a day before doing this. I’ve read over the manuals and think I’m ready. I’ll turn on the system tomorrow.

Voltage from the battery bank at the PDP

Voltage from the battery bank at the PDP

Solar array voltage at the PDP

Solar array voltage at the PDP

The order of operations as I see them is to first throw the breaker (#3 below) that connects the battery bank. This should bring up everything except the SCC. There may be a little bit of configuration required at this point. It seems that everything can be done from the System Control Panel. I believe the SCC can be configured at this point, but I’m not positive. At this point, the system should be inverting; it should be just like there is battery power, but nothing is coming from the solar array.

If all goes well, I will next throw the breaker (#1 below) that connects the SCC to the battery. If I need to do additional configuration, I’ll do it at this time. I think I need to enter the battery type (AGM), the amp hours of the battery bank (1530) and  possibly the voltage of the battery bank (48). I read that it will determine the battery bank voltage itself, but I also read that I will need to enter it. I guess we will see.

Again, assuming all is well, I will throw the last breaker (#2) which will allow power from the solar array to reach the SCC.

PDP DC area closed up with labels

PDP DC area closed up with labels

PDP closed up without its door

PDP closed up without its door

SCC wired and networked

SCC wired and networked

SCC wired and closed

SCC wired and closed

At this point, we’ll trying hooking up something AC-powered and see how it goes.

I plan to have a couple of outlets inside the battery house. I also have fluorescent lighting to be installed. I will also install a couple of outlets outside near the front door to replace our trusty but tiring generator.

Stucco update

Friday, January 15th, 2010

It’s done!

The first coat anyway. It needs to cure and to give off its salts before we add the finish coat. It’s been a ton of work and we both need a small break. We’re very excited though. The stucco layer brings a sense of wholeness to the house. Very cool. Bring on the rains.

Installing a Xantrex XW – part 2

Wednesday, December 30th, 2009

Today we mounted various components and started wiring things together. I’m afraid this will jump around a little. (And please if any one notices me doing anything suspicious, speak up.) First thing today, I connected the thick cables that will bring power from the batteries to the inverter. There is one really large breaker/disconnect between the batteries and where they connect to the inverter here. Note that I still have not connected the batteries to the system.

The heavy cables that bring power from the batteries

The heavy cables that bring power from the batteries

Xantrex provides covers for the power connectors

Xantrex provides nice covers for the cables

Next I mounted the other of the parts of the system: System Control Panel, Automatic Generator Start, and the Solar Charge Controller. My continuing education made a jump today when I realized why there are two battery chargers in the system. The one in the inverter converts AC from the generator, (or the grid if you have such a thing) the Solar Charge Controller converts DC from the Solar Panel array for battery charging. (It’s smarter than that actually (see MPPT), but basically that is it.)

SCP and the AGS

SCP and the AGS

And, yes that is a giant heat sync built into the SCC.

Solar Charge Controller (MPPT)

Solar Charge Controller (MPPT)

You will see what look like network cables running between the different component. And, indeed they are good old CAT5 network cables. All the devices talk to each other. There’s something a little funky in the system given that each device has two network connectors and the two ends have special terminators. It seems odd to me, but I assume they are doing interesting things. (One thing that I am sure of, is that they are providing power to some of the devices.) Here’s a picture of everything mounted. The installation instructions tell you to run the network cables early because things get crowded later on. I took them at their word and ran the cables as soon as the everything was mounted.

Xantrex XW system with accesories

Xantrex XW system with accesories

The next three pictures show the paths the network cabling take. Inside the PDP, there are special raceways for the network cabling. This is to shield the cables from interference and to help keep things organized.

From the SCC to the inverter

From the SCC to the inverter

From the inverter to SCC and the AGS

From the inverter to SCC and the AGS

SCP and the AGS

SCP and the AGS

You don’t see cabling to the SCP because it’s in the wall. For some reason, the SCP mounting hardware really wants a hole in the wall for the network cable; I obliged.

Now that I remember, the very first thing I did was install the air filter in the bottom of the inverter. You just push it in place with your hands.

The air filter

The air filter

Close up of the inverter connections

Close up of the inverter connections

The last thing for today was to connect up the wires that bring AC from the inverter to the breakers from which the house is the next stop.

AC out from the inverter

AC out from the inverter

And to ground the inverter.

The ground lug in the bottom of the inverter

The ground lug in the bottom of the inverter

Installing a Xantrex XW – part 1

Tuesday, December 29th, 2009

We are completely off grid. Our Xantrex system comprises an inverter, a battery bank, and a solar array.

We got the Xantrex XW6048 inverter as the brains/workhorse of our solar-powered system. Part of the reason for going with this system (rather than pieces) is the same reason I wanted the guy doing our concrete slab also taking care of the plumbing in the slab–I don’t want any finger pointing. Also, Xantrex has a great reputation. I think everyone around here that I have visited (on my tour of places using solar power) had a Xantrex inverter and they all seemed quite happy.

I searched the web for “Installing a Xantrex XW” and found nothing – nothing useful. I hope this will help others as I seem on my own… as far as the internet goes anyway. P.D. has been enormously helpful and I’m developing a small group of great people to ask questions of via email.

Xantrex gives you really great documentation. There’s a big bound manual and a color fold-out diagram/layout that shows many possible configurations-grid tied, off-grid, single or multiple inverters, etc. It all seems a bit over my head, but I think I can work through it.

As for the rest of the system, we got the Control Panel, which lets you configure and monitor all the different parts of the system from one panel, the  Power Distribution Panel, the Solar Charge Controller, and the Automatic Generator Start. I’m sure we will need some additional parts to get it running, but was a ready to begin.

The first matter at hand is mounting the equipment. The inverter weighs something like a hundred-thirty pounds. You don’t want to fool around with this. They give you a really solid mounting plate for both the inverter and the Power Distribution Panel (hence forth know as the, PDP).

The Inverter and the PDP mounted

The Inverter and the PDP mounted

Wiring the solar panels done

Monday, December 28th, 2009

At least until I get the energy or desire to install the next six panels. We should have plenty of power for construction with six panels.

Today, we grounded the solar panels.

Ground wires attached

Ground wires attached

Close up of grounding lugs attached to the solar panels

Close up of grounding lugs attached to the solar panels

We also finished running the conduit from the combiner box to the battery house. Into the conduit went the hot, neutral, and ground wires from the combiner box which will hook up to the charging unit of the inverter. I also made a small change based on a recommendation from P.D.; I wrapped white tape around the two negative leads coming from the solar panels. I meant to do that just because it made clear which wires were hot and which were negative, but once they were in place, I forgot.

Wiring complete

Wiring complete

The inside cover is back on

The inside cover is back on

Buttoned up

Buttoned up

Next we’re going to work on getting the inverter up and running. The first step is mounting it. It’s a hundred and thirty pounds so it needs a solid mount. I put six 3 inch lag bolts into studs to hold it, plus quit a few sturdy screws into the OSB. It’s not going any where.

Mounting the inverter

Mounting for the inverter

Wiring the solar panels

Saturday, December 26th, 2009

The first row of solar panels is installed. It’s time to look at wiring them together.

Finished

Finished

Each solar panel (data sheet, installation manual) has two cables on the back, one with a male connector and the other with a female connector. You can connect solar panels together (in series) with these cables. The more panels you connect together the greater the voltage. Because you need to have circuit breakers between the solar panels and the inverter/battery charger, you need to keep the voltages down to a level that’s reasonable for your DC breaker.

The power cables

The power cables

Our breakers can handle up to 150 volts. We will wire in groups of three panels which generates about 100 volts.

After you have connected your panels together, you’re left with one male and one female connector. One of these is positive and one is negative. These need to be connected to the combiner/breaker box. With our purchase, we got four 30 foot cables with the same connectors as the solar panels. What you do, is cut these in half (or so, depending on your arrangement) and use the two pieces to connect the solar panels to the breaker box. The end with the connector attaches to the solar panel, you strip the wire on the other end and hook it up in the combiner box. One very nice thing about this arrangement, is that you can wire the cables to the breaker box before you plug into the solar panel. This is very nice because solar panels can’t be switched off if it’s sunny.

midnight-breakerbox

Midnite Solar MNPV6 Solar Array Combiner

The combiner box we are using is from Midnight Solar. We will use four of the available six spots for circuit breakers. If we ever find that we need to get more solar panels, all we need to do is add some breakers and we’re ready to go.

It turns out that this combiner box needs some assembly. That’s because it was designed for a variety of uses. It was pretty simple to figure out what we needed, but it was hard for me to figure out how it fit together.

There is a plate that the breakers fit into that looks like it mounts in the box; it doesn’t. It kind of hangs in the air. The breakers have a screw in the back that clamps down on the plate. Once you get a few breakers installed, it’s quite secure. This plate supplies the combined (in parallel) power of all the solar panels to the battery charger.

I have a DC lightning arrestor that will be installed in the combiner box. It connects to ground, neutral, and the combined DC output. (We actually have a variety of lightning arrestors that will go throughout the system.) I don’t really know how much protection things like this provide, but considering the lightning I’ve seen here so far, it seems worth trying.

As for grounding the panels and combiner box, I put a grounding rod into the ground (eight feet down) inside of the center back concrete column. Bare copper wire is running from the grounding rod out of the column. I’ll use this to ground all the solar panels and the combiner box. (We had to order special little connectors that attach the grounding wire to each of the solar panels.)

There was a brief hiccup before we actually wired the solar panels to the combiner box. Someone asked a question regarding the rated amps (15 amps) for for the breakers and the amps coming from the solar panels. The case is that when you connect panels in serial, the voltages add and the amps stay the same. (If you combine in parallel, the amps add and the voltage stays the same.) So, the circuit breakers we have are fine.

The wiring in pictures… Click to continue »

Wiring batteries for solar power

Wednesday, December 23rd, 2009

I am no artist.

Unfortunately, the only way I could understand how to wire our batteries together was to draw a picture. Open Office has a nice drawing program. Despite its niceness, my drawing is not attractive. I think though that it’s accurate and it’s nice to have as documentation.

On a side note: Our blog is surprisingly nice for documentation. The other day I had to look up the pay load for the truck (hauling bags of cement) and it couldn’t have been easier.

This is the physical layout as well

This is the physical layout as well

The idea here is to create one giant 48 volt battery from a bunch (24) of 12 volt batteries.

The process is to wire the batteries together both serially and in parallel. Groups of four batteries are wired together in series to get up to 48 volts. (In the picture, this is the little wires that go from positive to negative.) The blocks of 48 volts are wired together in parallel to create the giant battery. (In the picture, the red and black wires are in parallel.)

giant-battery

Not according to plan, but electrically correct

Yes, as Karen pointed out, not according to plan. I confess that when I bought all the solar equipment I didn’t understand exactly how it all went together. I can’t imagine what I was thinking. I didn’t have the right cables to follow my plan. I was going to order the right cables when I realized I could use what I had. Instead of linking each block together with the one above it, I link it with the one above and across. It’s the same electrically, but a little funky.

Battery details:

Sun Xtender PVX-2580L AGM Sealed Battery

Volts: 12

Amp hours: 255

This is an addendum to my original post. The battery wiring went through a little reworking. This is the final physical layout. I wouldn’t have added the horizontal wiring; however, since I had them I used them to insure the lowest possible resistance.

The final physical configuration

The final physical configuration

The wires between the batteries are 2/0 and the ones going to the inverter are 4/0.

Time permitting or time spent waiting for a lath inspection

Tuesday, December 22nd, 2009

The inspector didn’t arrive until late this afternoon. There were fewer questions by the inspector about this inspection than any one so far. We passed, and it’s on to stuccoing. Once, that is, the threat of rain (and snow) has passed.

While I was waiting, I buckled down and got to work on the solar panel mounting. I got four of the first six panels up before it got dark.

The front edge bolted down

The front edge bolted down

The first of the back edge posts attached

The first of the back edge posts attached

Close up

Close up

Making progress on the back edge

Making progress on the back edge

The back edge is ready for the solar panels

The back edge is ready for the solar panels

Positioning the first panel on the front edge

Positioning the first panel on the front edge

Two panels up

Two panels up

Three panels up

Three panels up

Four panels up

Four panels up

A picture of thebackside

A picture of thebackside

I don’t really love the mounting hardware, but I’m not sure how I’d do it differently. It relies completely on the solar panel itself for lateral strength. I wonder if some kind of X bracing is in order.

Thanks for the help with this Douglas!