construction

...now browsing by tag


Timber!

Friday, February 3rd, 2012

On the adobe walls in the new house, we are going to have large timbers above the windows and doors to carry the weight of the adobe over them. And when I say large, I mean large.

Yesterday, we went to Silver City to pick up the timbers. It took an elaborate configuration of two forklifts to get them into the truck bed. Then because of the weight, the truck kind of tipped over on its back axle, and I think I heard it moaning a potentially dying cry, and we knew that wasn’t going to work. (We’d estimated the weight ahead, but you never really know what the moisture content of the wood will be.) So we arranged to have the timbers delivered by truck next week instead. (For a whopping fee of $20. Yeah. OK.)

The longest beam had already been put on the truck’s rack, so we went ahead and drove that one home. This morning we unloaded it. Man, was that thing heavy! We moved it in our normal heavily brain-assisted way with lots of leverage and small moves. Not exactly sure how we’re going to boost these things 8-12 feet in the air, but I’m sure we’ll figure it out. :)

Glass block

Thursday, December 29th, 2011

This week, it’s finally warmed up a bit so it’s back to work. We’ve begun wrapping and putting lath on the walls in anticipation of doing stucco. It’s good to see the house becoming more waterproof.

We also put the glass block in the exterior wall for the bathroom. When Brad did the glass block in the guest house, I was traveling so this was a new experience for me.

It starts out very messy…lots of gloppy mud.

IMG_265-sm1

IMG_2657-sm

IMG_2665-sm

Gradually starting to look like something from the outside.

IMG_2660-sm

These pretty light patterns are just what I was hoping for.

IMG_2668-sm

And here’s the finished product, from the outside…

IMG_2671-sm

and the inside.

IMG_2674-sm

New tile design

Thursday, September 15th, 2011

We poured a little stoop for the battery house today and had a new design idea.

batt1

batt2

Other than that, the roof is done, and we’ll finish the outside OSB tomorrow. Then it’s on to plumbing and electrical (I think).

The weather here is starting to change. The monsoons, which have been light and should be over by now, seem to have picked up steam in the last couple of days. Last night, it rained all night, and the thunder booms shook the whole house. It seems to be getting cooler and seems like fall is here.

Another day, another roof

Friday, August 26th, 2011

Three sides of the house are now covered with only the short side still to do.

virga-082611

And today our friend Floyd from MasterCraft Metals came out to cut and deliver our roofing material.

I made movies and took pictures while Brad and Floyd did the work.

Here are the resulting pieces. Plenty of work for me to do now.

roofpieces

46,000 pounds

Thursday, August 4th, 2011

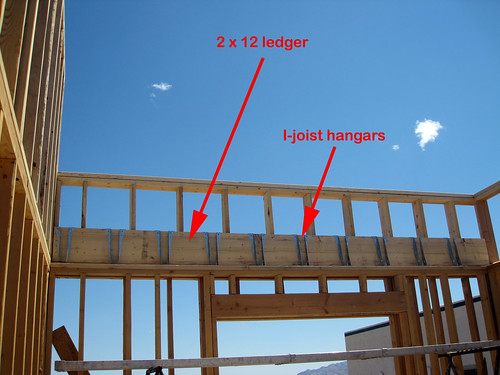
For about two years, we have been searching for a supplier of adobe bricks.

Mostly, I love doing everything ourselves, but fencing 40 acres and making our own adobe were two things I’d rather not do.

So we pursued numerous avenues. There was a guy who would come make bricks right on our property that we were excited about. Except that he never seemed to be able to come out here and the price kept going up. Then rumor had it that there were a couple local suppliers. None seemed to be in business anymore. Of course, there was the route that several people we knew took of getting bricks in little batches from Mexico, but the stories of how that went were too terrible to recount here.

Finally, about a month ago, Brad found New Mexico Earth Adobes in Albuquerque who said they’d make and deliver bricks. Delivery is always a big problem here, and especially with adobe which is very, very heavy and not economical to ship. Just a few weeks ago, this place had a “sale” on bricks, and so we jumped on it. Delivery was all set, and we upped our order to a whole truckload.

The driver was scheduled to arrive at 6am this morning.

At 5am, our alarm went off. A minute or two later, Brad said, “I hear the truck.” It was pitch black.

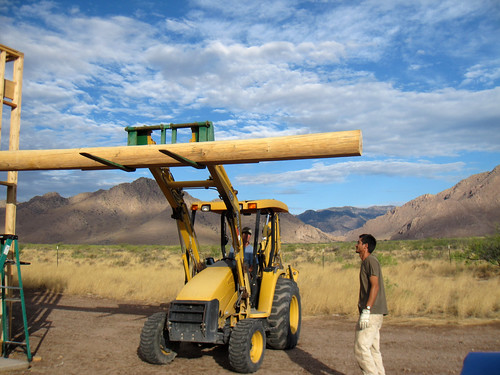
We dressed hurriedly and got ready to receive. Our friend who helped us forklift the vigas had also agreed to help unload this truck, because the driver wasn’t permitted to bring a forklift into AZ (the many-eth time we’ve had cross-state permit issues.) He wasn’t scheduled to be there until 6 so Brad went out to see the driver.

Next problem — this was the 2nd truck that couldn’t get in our driveway. (Perhaps not coincidentally, they were two of our largest and heaviest deliveries.) The 70+ foot truck wasn’t a problem, but he had an enormous sleeper cab that wouldn’t make the turn into the gate without taking out a post.

truck

So….we adjusted plans and decided to unload all the bricks at the front gate and then to transfer them up to the house.

Another issue, but one we already knew about, was that our friend’s forklift couldn’t lift the 2500 pounds that each pallet would normally weigh. The company agreed to pack them at 2000  pounds (at no charge beyond the extra pallets – much appreciated), but even that seemed a little heavy, so Brad and I transferred about 12 bricks from each pallet to some extra pallets we had. They weigh about 30 pounds each. That is  a lot of weight to move by hand, and as we did it, I knew that this was only the first of many times we’d undoubtedly be moving these by hand. (Who needs a gym?)

unloading

All went well. Here’s the truck before and after:

beforeandafter

And here’s the staging area at the front gate.

staging

And finally in their temporary storage spot (where our lovely patio will one day be). This picture also gives a good idea of the proximity of the two houses.

by_houses

The bricks are lovely, very uniform and durable. We broke almost none in the various moves today (and we’ve seen adobe bricks that broke if you sneezed and melted in the rain — these are stabilized though.)

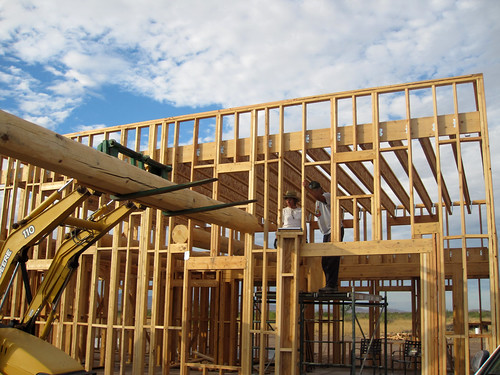
It will likely be some time before we start building with this. We have to get the whole house covered and electrical in first. It’s great to have this looming procurement challenge behind us though.

Roofing process

Wednesday, August 3rd, 2011

So we’re deep into the roofing. Because we didn’t document the first steps last time around, we’ll do it here.

After the i-joists are up, the next step is to put up OSB (sheathing, plywood). The sheets have to be cut so that each ends mid-i-joist. When the sheets are cut and put down, I put a few screws in them to hold them down. (Later, they’ll be nailed.) This time, we’re putting little clips on the edges to make it stronger (upon recommendation by a construction friend).

osb_roof

The OSB is down and it's time to keep the rain off.

After the whole section is done, we’re ready for the nailing. First, though, we chalk a line where each i-joist is so that we can nail along them. Every sheet gets nailed every 6″ or so along the entire length of the i-joist. This is hot work! Thank god for the nail gun.

It’s important to hit the i-joist. After we’re  done with this, I go downstairs and look for any nails that missed (“shiners”). There aren’t many misses, but they’re usually along seams that have to be nailed on both sides. The shiners have to come out. Otherwise, they will wiggle around and come up through the underlayment.

For those interested in the division of labor, Brad usually does the cutting and positioning. I do the screwing and nailing.

Next step is the underlayment. (We use Sharkskin.) This is rolls of wrap that go down over the OSB and before the metal roofing. It is all nailed by hand. The nailing pattern is every 6″ long ways and every 12″ width-wise. The overlap is 3-4″. The corners are wrapped like present corners. Brad seems to think I have a knack for them. (She does.)

underlayment1

Start in the corner and really try to keep it straight.

underlayment2

Karen does most of the nailing while I keep the sharkskin tight.

underlayment3

Two rows down.

underlayment4

Ready for the last row. It has to be rolled out before it can be nailed because of the parapet.

underlayment5

Karen's corners - because there are no cuts, they should be very water tight.

As of today, we have Skarkskin on all the high roof and OSB on the rest. We should be ready for metal in a couple weeks if not sooner.

Careful planning pays off

Wednesday, July 20th, 2011

Today was the day when the big vigas went into the house.

We spent most of the day yesterday planning and preparing for this. In order to finish them, we are putting the vigas in at a lower height than they’ll eventually go (ultimately, they’ll be pressed against the top of the ceiling) . Then later we’ll jack them up to the top.

To get the vigas in, we planned to use a backhoe with forklifts to push the vigas into the side of the house. On the outside wall they’d go through, we’d built headers. We also built a box with rollers on top of it to help ease each viga in. (They are incredibly heavy.) The box was leveled on platforms we built for each of the five viga locations.

roller1

roller2

Once the ends of the vigas were pushed in, they’d sit on scaffolding in the middle of the house. We built a strong box on top of the scaffolding to hold the vigas.

Once the vigas were on the scaffolding, we’d push them to the other side, where they’d rest on top of the glulam.

So that was the plan.

And amazingly enough, it went pretty much according to plan. Our worst case was that it might take 6 hours (with four of us and a backhoe). In fact, the whole thing was done in under 2 hours.

More pictures here.  (slideshow version)

They look so beautiful. Next stop — a roof!

Getting a better idea of what this will really look like

Thursday, July 14th, 2011

In our on-going quest to see how much work we can plow through in a short period of time, we got the last of the i-joists up today. These were on the high part of the roof in the big room.

We did the ledgers and hangers all yesterday, so the process today was cut the i-joists to fit, hoist them onto the roof, go up on both ends (Brad on the short roof, me on the scaffolding), lower the i-joist into the hangers, repeat, repeat. Afterward, we nailed a ton of brackets.

IMG_2096

It really isn’t until you get the roof on that you can tell what a room is going to be like.

We’ve looked at drawings, 3D models, etc. of our house, but today we really saw what it will be like. Wow.

IMG_2114

Four walls

Monday, July 11th, 2011

Monsoon season has officially arrived, though we haven’t gotten more than a couple very brief showers, not really enough to even soak the ground, but still promising. The good news is that the evenings have finally started cooling off. Yesterday, we had a remarkable 40 degree span in temperatures (about 110 in the afternoon and then in the 60s in the evening). This makes for much better sleeping; nights in the 90s weren’t doing much for me. We’ve also had some lovely evening shows of thunder and lightning. Disturbing to the cows, but beautiful to us.

This week we’ve been working hard and now have all our exterior walls framed — including the very high ones, which we weren’t sure we could put up by ourselves.

We did.

fourwalls

The process went something like this. Brad stood on the ground and heaved the wall up. (For one particularly wide section, we both heaved from the ground and propped the wall up on ladders.)

proppedup

Then I stood on the scaffolding with a rope and pulled with all my might while Brad pushed the wall the rest of the way up. (For that particularly wide wall, we used two ropes.) The scaffolding was actually tied off to the truck so that it didn’t tip forward.

pull

Initially, we didn’t put in all the window framing and headers in order to keep the weight as light as possible. Then we added them in place later.

firstofthebigwalls-b4

Before extra framing

firstofthebigwalls-after

And the same wall segment after

Overall, it wasn’t as hard as we thought it would be. Most things aren’t.

Ebb and flow

Saturday, July 2nd, 2011

It’s weird how construction progresses. It seems like sometimes we work a lot and the progress is slow, and other times, things seem to leap ahead. That was today.

We got up at 5am to get some work in before the heat set in. By noon, we’d not only finished all the remaining parapet walls, but got the back half of the house’s i-joists (ceiling beams) in. Amazing.

To put up the i-joists, we first had to hang  a 2×12 ledger board to which the hangers would attach. (Oh and before that, we had to move a gigantic stack of lumber. More fallout from the delivery without a bobtail.)

(Sorry about the misspelling in this photo; I’m too tired/lazy to fix it.)

On the other side of the ledger, a bracket attaches to each stud to make sure it can carry the weight of the roof. Each bracket has 12 nails in it, and they’re at very difficult-to-get-to angles. Perfect work for the palm nailer!

These are the long i-joists, running the whole width of the house, over our bedroom and the office/laundry.

Here’s the bedroom side. The high wall in the foreground is the back wall of the kitchen, which has (or will have, I guess) a high ceiling like the great room.